Going Real Time With Web Sockets
Going real time with websockets

What are websockets?
Simply put, websockets are a way of communicating between the server-client. But you might be wondering, don’t we already have HTTP APIs for that thing? Well, both have their applications and situations where we can employ them. Let's try to understand it through an example.
Naruto is hosting an extravagant party at his house in the Konoha village where he is expecting more than a thousand guests from his neighboring villages. At around 6 PM his guests start to arrive. Whenever any guest rings the bell of his house Naruto opens the door for the guest, greets them and closes the door after letting them in. But after sometime Naruto gets busy with all the guests and he decides to leave the door open for the new guests.
In doing so, Naruto has explained to us both of the methodologies of communication over the web. For now, let’s consider Naruto as the server and the guests as the clients. The initial approach, where Naruto was opening the door for each guest and closing it afterwards, corresponds to the API method where the client has to request the server for each time it needs some data. In the later approach, where Naruto leaves the door open for the guests to come inside, is the sockets approach where the connection between the client and server stays open throughout the connection allowing for continuous data flow.
So now you get the idea, let's define what websockets are. Websockets is a communication protocol which enables us to achieve two-way, full-duplex real time communication between the server and client. Once the connection is established, one can send any number of requests to and from the client and server until the connection is terminated.
Why do we need them?
Now you might be thinking, can’t I tweak my application such that after every n seconds it will call the API and get the data which it needs. That’s an interesting approach but not ideal when you have real time data coming into the picture. Just imagine Naruto checking the door every n seconds to see if there are any new guests at the door and then letting them in. It's not a subtle experience for the guests, and it leaves a negative impression of our beloved Hokage.
Thus, websockets are useful when you want to send a continuous amount of requests which are relatively small in size. They are ideal to build real time applications such as chat apps, online multiplayer games, etc where information needs to be constantly updated and shared. In short, whenever your application needs to:
- Exchange data bi-directionally in real time
- Give users constant live updates, without having the users to reload the page
- Enable responsiveness and interaction … then websockets can be your go-to buddy.
Let’s build!
Now that we are familiar with what websockets is, let’s go further by building a real time application. For this blog we are going to create a web application which will allow users to collaborate on a document in real time. Yes you guessed it. It's like Google Docs.
To follow this tutorial you will need a basic understanding of React.js, Node.js and obviously HTML, JavaScript and CSS. Though in this tutorial we will focus more on building the application rather than styling it.
Don’t worry if you find yourself navigating a bit off-course while coding, I have added my source code at this Github repository.
Backend
Let’s start by creating a directory for our server and initializing the directory.
mkdir server
cd server
npm init -y
We will be using the socket.io library which highly abstracts away the complexities of handling real-time communication and is really easy to use. Let’s install the required npm modules by running:
npm i socket.io express nodemon
Then create a new file named index.js. Here we will define our server’s code. We will use the Express framework to create our server.
const express = require('express');
const { createServer } = require('node:http');
const { Server } = require('socket.io');

const config = require('./config.json');

const app = express();
const server = createServer(app);
server.listen(config.SERVER_PORT_NUMBER, () => {
    console.log(`Server up & running at http://localhost:${config.SERVER_PORT_NUMBER}`);
});
This will set up a server to listen on my desired port. I have kept the ports under the config.json file.
{
    "REACT_PORT_NUMBER": 3000,
    "SERVER_PORT_NUMBER": 4000
}
Now we have the bare minimum setup complete. We will use nodemon to run this file, as it makes development work super easy and neat by restarting the server every time you make some file changes.
nodemon index.js
If all works out correctly then you will have the following message logged on your terminal.
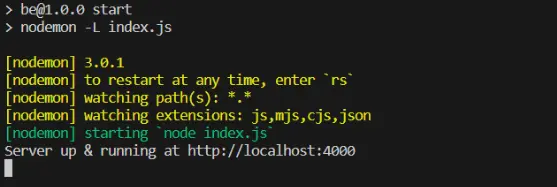
Next we will initialize a Socket.IO server by passing it our HTTP server instance.
const io = new Server(server, {
    // During development, enable CORS on your server.
    cors: {
        origin: `http://localhost:${config.REACT_PORT_NUMBER}`
    }
});
io.on("connection", (socket) => {
    console.log("A new user connected: ", socket.id);
});
The above code is pretty self-explanatory. I created a Socket.IO server which on connection from a client will simply log the client’s ID.
Keep the server running. In the meantime let's start building our frontend.
Frontend
Let us begin by creating a react app by using create-react-app.
npx create-react-app my-app
This streamlines the entire setup process for our React app, eliminating the need to navigate through any unnecessary technicalities, so that we can focus more on our development chores. Once the setup is completed, change directory into the my-app/ and run npm start in your terminal to start the frontend. If all works correctly you should see the following screen in your browser.

Next we will install Socket.IO’s client library in our frontend to help connect with our server.
npm i socket.io-client
Create a new file named socket.js in your /src directory.
import { io } from 'socket.io-client';
const config = require('./config.json');
export const socket = io(`http://localhost:${config.SERVER_PORT_NUMBER}`);
We can now use this socket variable in our components to send and receive socket requests to and from our server.
For our web-app we will require just two components - our Homepage and the WritingBoard component.
src
|
|_ components
	|
	|_ Home
	|
	|_ WritingBoard
Our Homepage will be the landing page for our users. Here we will provide a button which will navigate the users to a page where they can collaborate on a textbox in real time.
Let’s first install a package called react-router-dom to help us with client side routing.
npm i react-router-dom
import { Link } from 'react-router-dom';
import React from 'react';

export const HomePage = () => {
    return (
        <div>
            Collaborate
            <button>
                <Link to="/write">
                    Write
                </Link>
            </button>
        </div>
    )
};
Next we create the WritingBoard component.
import React, { useState } from 'react';

export const WritingBoard = () => {
    const [content, setContent] = useState("Edit me!");
    const handleChanges = (event) => {
        setContent(event.target.value);
    };
    return (
        <div>
            <textarea
                value={content}
                onChange={e => handleChanges(e)}
                rows={10} // Set the number of visible rows
                cols={50} // Set the number of visible columns
                style={{ resize: 'none' }} // Prevent resizing
            />
        </div>
    )
};
This component shelters a textarea input tag whose content can be edited by the user. But our web page looks the same as before even after adding these components. Don’t sweat it out, let us edit our App.js file and add the routes.
import { Routes, Route } from 'react-router-dom';
import React from 'react';
import './App.css';
import { socket } from './socket';
import { HomePage } from './components/Home';
import { WritingBoard } from './components/WritingBoard';

function App() {
	return (
		<div className="App">
			<Routes>
				<Route path="/" element={<HomePage />} />
				<Route path="/write" element={<WritingBoard />} />
			</Routes>
		</div>
	);
};

export default App;
Now you can see the minimalist UI displaying just a button. When the user clicks the Write button, we will redirect the user to the WritingBoard component.
Integrate live updates
The first thing we want to do when the user lands on our page is to make a successful socket connection with the server. Let us edit the App.js file by adding a new useEffect hook so that whenever the component mounts, it first makes a socket connection.
import { Routes, Route } from 'react-router-dom';
import React, { useEffect } from 'react';
import './App.css';
import { socket } from './socket';
import { HomePage } from './components/Home';
import { WritingBoard } from './components/WritingBoard';

function App() {
	useEffect(() => {
		socket.on('connect', () =>
			console.log(`Connected to socket successfully with id: ${socket.id}.`)
		);
	}, []);

	return (
		<div className="App">
			<Routes>
				<Route path="/" element={<HomePage />} />
				<Route path="/write" element={<WritingBoard />} />
			</Routes>
		</div>
	);
};

export default App;
Great! Now we have accomplished a thriving socket connection with our server. Next up, to propagate the modifications made to our textbox across all connected socket nodes, we will broadcast these changes by emitting them.
import React, { useState } from 'react';
import { socket } from '../../socket';

export const WritingBoard = () => {
    const [content, setContent] = useState("Edit me!");
    const handleChanges = (event) => {
        setContent(event.target.value);
        socket.emit("content-changed", event.target.value);
    };
    return (
        <div>
            <textarea
                value={content}
                onChange={e => handleChanges(e)}
                rows={10} // Set the number of visible rows
                cols={50} // Set the number of visible columns
                style={{ resize: 'none' }} // Prevent resizing
            />
        </div>
    )
};
The name of the event is content-changed. However, you can change the name of the event to your liking :)
You can also emit any number of events depending on your use cases. We are also sending the textbox’s content along with the event.
Nice, we are now broadcasting socket events from our frontend whenever there are any changes in our textbox! But who is processing these events? For that let us go back to our backend and make some changes. We want our server to broadcast these events to all the connected socket nodes.
const express = require('express');
const { createServer } = require('node:http');
const { Server } = require('socket.io');

const config = require('./config.json');

const app = express();
const server = createServer(app);
const io = new Server(server, {
    // During development, enable CORS on your server.
    cors: {
        origin: `http://localhost:${config.REACT_PORT_NUMBER}`
    }
});

io.on("connection", (socket) => {
    console.log("A new user connected: ", socket.id);
    socket.on("content-changed", (content) => {
        // This will broadcast the new content to all the connected sockets,
        // except the socket which initiated the event.
        socket.broadcast.emit("new-content-received", content);
    });
});

server.listen(config.SERVER_PORT_NUMBER, () => {
    console.log(`Server up & running at http://localhost:${config.SERVER_PORT_NUMBER}`);
});
Whenever the server receives the content-changed event from a node, it will broadcast the content sent by that node to all the other nodes through the new-content-received event.
Now to get this new content in our UI, we will have to handle that logic in our frontend. We will make use of the useEffect hook to check for any new content received from other nodes, and set our page’s content to the new content. Pretty neat right!
useEffect(() => {
	// Checks for any new content and reflects the same on the page.
	socket.on("new-content-received", newContent => {
		setContent(newContent);
	});
}, []);
If all things go well, you will have an up and running web application, serving up fresh and real time content to all of your users. To test if content is supplied to all the users, you can fire up the web-app in another tab. The changes you perform in either tab will be reflected across both the tabs (or however tabs you keep open).
Bonus
Unlock a new level of interactive creativity by adding a new fascinating functionality into your application. Now, users can engage in the captivating experience of collaboratively drawing in real time. If you are up for the challenge and want to follow along, the code awaits for you in this Github repository.
Conclusion
In this blog, we've explored the concept of sockets and identified practical applications where they can be effectively utilized in various use cases. This marks the inception of a fascinating journey, with countless possibilities awaiting exploration. From crafting engaging multiplayer games to dynamic chat applications, the horizon of applications extends far beyond.